Posted on Leave a comment

5 Mind-blowing ways to tie your laces

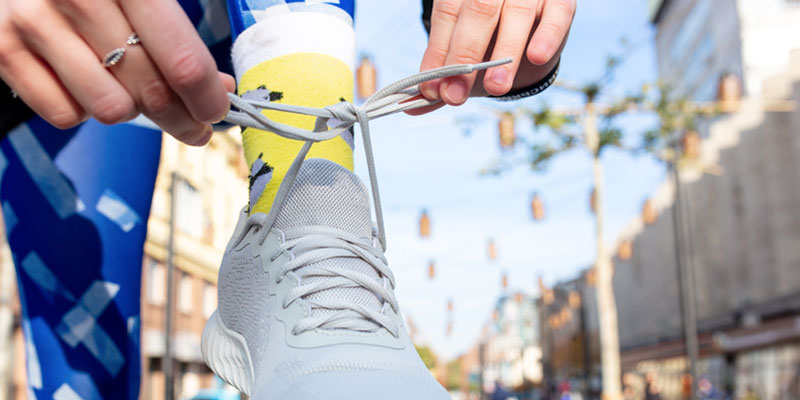
The lacing of sneakers should not only be beautiful but also durable. These are sports shoes designed for heavy loads; therefore, they must be securely attached to their feet. But at the same time, modern fashionistas who regularly go in for sports want to slightly diversify the appearance of their shoes. Buying new sports shoes is impractical, and with the help of interesting lacing methods, even old sneakers that have had time to get bored a little can be updated. We have collected different lacing options that everyone can easily master. They are reliable and will not come loose at the most inopportune moment of training.

With a secret knot

One of the fun ways to lace up your sneakers is with a hidden knot. To crank this procedure, you need:
• Start lacing from the bottom holes.
• Pass them through the holes, adjusting so that the right side is longer than the left (the difference should be small, so do not overdo it).
• Then the instruction is the same as in the previous case – parallel lines should form.
• At the end, do not lace up the left end, but draw the right end through the left hole.
• Both ends should be on the left (because the right side of the lace should have been left a little longer).
• Tie the ends in the corner, and tuck inward.
The knot will not be visible, but the lacing will be strong and will not creep.


Sherpa knot

When the laces are constantly being untied, a surgical method of tying can be used. This method is reliable, but difficult to implement:
• tie two laces symmetrically.
• make a loop from the right braid without tightening.
• thread the left part several times into the hole formed between the two ropes.
• tighten the identical intertwined loops of the two laces.
The sherpa knot differs from the standard tying method by threading the second strap through the loop several times to secure it in place. The universal method is compatible with any shoe model.


Stangled Trail

This lacing is complex and is used mainly for sports models. For an original tie, one rope is threaded through the top hole and pulled in a zigzag pattern through three holes in the fourth. When the penultimate hole is reached, the lace is threaded from the inside into the extreme hole, then pulled in the opposite direction in a zigzag through 3 holes into the fourth to the penultimate upper row.


Criss-Cross


A popular method is suitable for any shoe model: lacing looks equally stylish on classic shoes and sneakers. The ribbon is passed into the lower holes from the inside, removed from the outside and inserted from the inside of the opposite hole located 1 row below. The other end is threaded in a similar manner to cross the ropes. This method allows you to tightly fix shoes or sneakers on your foot.


Lightning

To wear a “zipper” on your sneakers, you need to be a creative person. It is very simple to lace up in this way: lacing begins with two lower holes from the inside; one tip extends through all the holes to the last and turns out to the opposite side; the second end is threaded from the outside through the second hole from the opposite edge and is threaded through the third hole from the same side; lacing continues to the end, after which a knot is tied.

Posted on Leave a comment

How to store your shoes properly.

Of all the clothes and accessories, we must store in our room, shoes are among the most egregious problem item. We possess too many pairs for our own good, and they are often bulky or come in weird shapes.

Most of us have several different types of footwear to store, including everyday shoes we might wear to the shops or office, sneakers or running shoes for workouts, boots for cold weather, and heels or special-occasional footwear.

It’s time to stop tripping over your heels or digging through mismatched sneakers every time you want to leave the house and look presentable for society.

There are many different ways you can organize your shoe mess, whether you prefer to stack them or line them up — or maybe you’ll take any configuration as long as it saves space and makes your shoe situation neater.

The most common mistake people make is to squash all these different types of shoes together at the bottom of the wardrobe or jumble inside a large box. Not only does this create an unwelcoming pile of clutter, but it can scuff footwear and make it lose its shape. Plus, it can make finding a matching pair tricky.

Keep your shoes off the floor.
When it comes to storing shoes, your first instinct may be to chuck them on the floor of your closet. This is the wrong instinct.
It makes your shoes harder to find when everything has flopped over each other in a big space. They are also more likely to get beat up when you are constantly moving pairs aside in the search of your favorite flip-flops.

If you insist on sticking with the floor plan, though, implement some basic shoe organization.

Use a shelf or rack
After choosing a space, use a shelf or rack to get them up off the floor and safely stored away. You can have one installed or get a simple multi-purpose shelf and using storage containers or individual shoeboxes is also a good way to protect them while being stored.

Clean and dry your shoes

Before storing, make sure that they are dry and free from any dirt that may degrade certain shoe materials over time. Some materials such as leather may require special care so use the right cleaning agents for each pair you have.

Use clear shoe boxes with lids

As any organization pro will tell you, it’s harder to pick out clothes and accessories when you don’t know what you’re looking at. Stuffing everything in a tub makes it impossible to imagine your options, so when you’re sorting your shoes, try to keep them as visible as possible.

Store boots upright
Depending on their length, boots tend to flop over and take up a lot of unnecessary floor space. To keep them in shape (literally), use rolled-up newspapers or magazines, or even old plastic bottles.

Proper shoe storage is key to maintaining your shoes and extending their lifespan, but it is not the only thing you can do to keep your footwear looking great.

Posted on Leave a comment

How to clean sneakers. 3 Simple Steps

There is no better feeling than unboxing a new pair of kicks. That fresh smell can fuel a sneakerhead’s dreams. But once they are out of the box and on the street, anything can happen to your shoes, from scuffs, stains, spilled drinks, to general grit and grime.
Dust, dirt, salt, and traces of other people’s feet – all this awaits us when we go out into the street in sneakers. Alas, this is inevitable. To extend the life of any pair, it is worth stocking up on cleaning and care products.


  • 1. Step one is simple: Remove any visible dirt. You can do this with a clean towel, toothbrush, or even your hand if pressed for time. Wiping for dirt every time you put your shoes away will help prevent build-up and save you some serious headaches along the way.
  • 2. Next, you will want to rinse off the soles. Even if you were walking on a relatively clean surface, you would be surprised by the debris that can get stuck on the bottoms of your shoes. So, rinse them off with a wet towel or hose. This does not have to be too involved but should certainly be done.
  • 3. And finally, spot cleans any big stains. If the stain is large enough, you should be able to remove it by quickly blotting it with a soap and water mixture.


How to clean the midsole
Though you can get away with lax outsole maintenance, you absolutely cannot take such a chill approach to your midsole. This section of the sneaker is clearly visible and is usually intended to be bright white, so it is important to clean it regularly.
An easy solution is to take a good old-fashioned Magic Eraser to it. Perhaps not the most elegant trick, but it can do a lot to enhance the color of a rubber sole and reduce grime along the edges.

We don’t recommend putting your shoes in a washing machine or dryer or using harsh cleaning products (like bleach). And for best results, clean your sneakers as soon as they get dirty. Then lace up and get back out there.

Posted on Leave a comment

10 Ways To Identify A Fake EcoFlex® Shoe

Just like any other brand, ecoflex ® will have its own fair share of fakes. After all, ecoflex ® is known not just for its comfort, but also for its stylish and casual designs. And more importantly, nobody wants to pay a good price for a fake ecoflex ® product.

  1. Excellent finishing is our main specialty, so investigate even the smallest details.
  2. Great products start with great ingredients so inspect all the materials including the midsoles.
  3. Our ecoflex ® shoes have branded tongues so check the tongue of your shoe.
  4. Our ecoflex ® shoes have great Italian designs, so be aware of the style.
  5. Ecoflex ® is a registered brand belonging to IFS so if anyone can sell lower than IFS then it is probably a fake.
  6. Always ensure that the seller is an authorized seller of IFS.
  7. Look at the stitching, in socks, glue stains, proper labels, and tags since the art of perfection is the art of concentration, and each ecoflex ® shoe is carefully inspected.
  8. Ensure the brand is clear and readable.
  9. If you still have any doubt, observe the weight of the shoes. A fake ecoflex ® shoe will seem rigid and quite heavy compared to the original. After all, a genuine ecoflex ® shoe must be light for you to move comfortably.
  10. Inspect the outsoles branding.
Posted on Leave a comment

Ballerina Young

New arrived Ballerinas

Ladies flat comfort ladies shoes. Fun to wear and incredible comfort you won’t believe existed. With its natural flexible sole and padded foot bed, you will feel as if you are walking in the clouds.